barnduskreduced

Search This Blog

About Me

My photo
Tucson, Arizona, United States
I work as Panther Peak Bindery and am a bookbinder, conservator and instructor working outside Tucson, Arizona for individual and institutional clients across the country. I am a two term President of the Guild of Book Workers, was a Fulbright Scholar, taught at North Bennet Street School for over nine years and was the fastest in my middle school class at running up and down a flight of stairs (really!).

____________________

____________________

Monday, October 31, 2016

Artifact or Book?

A book and an artifact might look exactly the same. But they are completely different things and need to be treated differently.

A book is only important because of its content. The words on the page are all that matters. For that reason it is not all that important or necessary to save the binding and related materials.

An artifact is a book-as-object in which the book’s significance exists beyond its content, or even the physical object itself. Who owned it, how did they use it, where did they keep it, why did they have it, did they read it? What mattered to them?


What can be difficult is that what makes something an artifact is most often something outside the object itself.

You might have two books on a table that look exactly the same. What are they: books or artifacts? Let’s say that one of them was owned by me. The other one went to the moon. Or one book was in Jefferson’s library and the other one belonged to an Athenaeum someplace.

Knowing that information would greatly alter the approach to the repair of the object. An artifact requires that the repair be as unobtrusive and unintrusive as possible. It requires that all (ALL!) original pieces be saved and hopefully reused. If they can’t be reused they should be stored with the object, perhaps in a box with drawer.


But it doesn’t need to have been held by Lincoln to be an artifact! A book you used as a child and want to have repaired so you can gift it to your grandchildren would also be an artifact.

Why does it matter? Because the object itself tells a story.

How was it covered? In leather? Does that indicate the wealth of the owner? Does it indicate the culture they came from and what they valued in a binding?

What kind of leather? That might indicate the local economy, the kinds of animals raised around there. In might say something about the leather industry in that part of the world.

This can go on and on. What kind of paper was used? How was it printed? What was the structure of the binding? What techniques were used?

All of these questions tell stories, and all of them add up to paint a picture of a place and time and a person.

Removing an original binding erases all those elements and destroys the picture.


Of course with marginalia it’s clear how that contributes to the story. Seeing the notes of famous people shows what they were thinking when they read a particular passage. Their unguarded thoughts, who they actually were, and what triggered their reactions.

But a child’s marginalia, your marginalia from your youth, can be just as important and significant as Washington’s. It tells a story, tells something about you.


The sad part of this story is the movement away from books to mobile devices. No covers, no paper, no marginalia. No stories for them to tell.

But what is sadder is binders putting new, overly-decorated covers on old books—books which had very nice, functional, and usable bindings that told stories, told a part of history—and then calling that work conservation. It’s not. It’s the opposite of conservation. It’s the opposite of conservation!

I recently saw a tarted-up binding done for a first edition of The Book of Mormon. Lots of gold, lots of leather, lots of wow. The binder posted it as an example of conservation. I’m sure the owner asked for it to be done. I wonder if the binder talked to them about the value of conservation over rebinding. Of the history in the binding, perhaps of the monetary value of having the original binding repaired. Perhaps there was no cover and that wasn’t an option. Still it made me a bit sad.

As a private binder and conservator I often tell my clients the difference and then let them tell me if their item is a book or an artifact. Often they are not historically significant books in the traditional sense, but they are significant to them and their family. In that case the owners are the only ones who can make that distinction.

But at least the question is asked and discussed. And the decision is almost always the right one because the question has been asked. It’s when the question never comes up that unfortunate things
tend to happen.


Monday, October 24, 2016

A few airbrush lessons I've learned


A friend of ours, Chris Andrews, is a fine art airbrush artist.  When I started using an airbrush for leather dye I had him come out and give Bailey and me a lesson on how to use it, how to keep it from acting up and how to best clean it when it starts acting up.

Three main points he made were:

1. Use plastic bottles, because they weigh less.  They also don't break when dropped.

2.  Clean by spraying ten or fifteen seconds using an everyday cleaner which I keep in a bottle so it's always ready to use. Then I follow by spraying water through the spraybrush for another ten or twenty seconds.  I just spray into a garbage can.  The plastic bottles are cheap enough that it's easy to just have these two bottles filled and ready to go.


This has reduced the amount of maintence work I've had to do on the brush drastically.

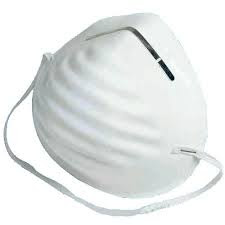
3.  Use a mask.  Seems that using a dust mask is enough for leather dyes, but for the fixative I use a respirator since it seems to get everywhere.  Maybe the fixative is what ruined my glasses?


The brush should be taken apart and cleaned when it starts acting up, which isn't very often if you use  his cleaning regime.

He uses a larger, tool compressor. Sure, he's also painting for hours at a time, but they can be cheaper than some artist airbrush compressors and when up to pressure wouldn't need to run very often at all so they could be quieter as well.

I doubt any of this is revelatory, but to those of us new to the airbrush it was pretty helpful and time saving advice.

Monday, October 17, 2016

razor blades

We use razor blades on our leather paring machines. My machine of choice has been the Brockman but many people use the Scharf-fix as well. Basically they are designed to hold razor blades at a fixed point so that when leather is drawn through the machine it removes an even amount of leather.

The Scharf-fix comes with blades, the Brockman didn’t. I should add that the Brockman is no longer made, which is a shame, but the cost was always higher than the Scharf-fix and they had trouble selling because of that. I find them easier to use, less finicky, and get better results.

I’ve heard a few horror stories about Scharf-fixes the past few years but the manufacturing of them has returned to Germany and hopefully the problems are a thing of the past. The problem is that the machine’s adjustments would change while people were making passes with leather, which resulted in uneven paring and wasted time and leather. And a bit of swearing as well, probably.

I have a few of the new ones but haven’t had a chance to use them yet. I’ll report on them when I have had a bit of time with them.

In the 1990s, I used to buy Wilkinson blades from the Bartell’s drugstore near my apartment in Seattle (65th and Roosevelt, if you care) and they were utterly fantastic. These were the days before the Internet so there was no simple way to buy a case of them. But the drugstore carried them all the time so there was no need.


Until they disappeared. Eventually I found them again, most notably in London where I bought a bunch. But they weren’t as good as I remembered. Later I found out that Wilkinson had moved their manufacturing from England to Germany and most aficionados feel the quality of the blades deteriorated. I had no idea that had happened, but definitely noticed that the blades weren’t as good as before. Twenty years later I found out that I wasn’t just imagining it.

People still shave with double-edged blades. There are a couple of sites for fans: Badger and Blade, and The Shave Nook. On both those sites can be found reviews of blades.  One from Badger and Blade is here (there are several on that site):


There’s another, and better, set of reviews, with photos of the bevels, here as well:


Many people think that sharp is sharp, and that’s all that matters. The sharpest razor blade is considered to be the Feather. It is indeed the sharpest by virtually all accounts.


What’s important to note, especially in regard to using blades in leather paring, is that sharpness is just one factor. Feathers are very sharp but don’t hold an edge long enough to really accomplish anything. I found them dulling before completing even one pass. For leatherwork they are worthless, but for shaving they’re great. Different purposes and uses, different results. On these sites they’ll talk about how many shaves they get before they go dull. That’s going to be a factor when paring leather.

Of course it’s really no different with knife sharpening. Some folks sharpen a knife and it just doesn’t hold an edge, others sharpen and it stays sharp for months and months. But in those cases you can’t blame the knife; with razor blades you can. Take advantage of that!


The political situation in Russia has had an interesting effect on razor blades. Thanks to Putin’s actions (well, Ukraine and Crimea, more than riding a horse without a shirt) the Ruble has lost much of its value over the past few years. That meant that blades could be bought pretty inexpensively. Good blades, too.

What was happening was that Russians were selling blades on eBay and taking payment via Paypal. To my understanding they would then leave the money in Paypal, which would insulate it from the decline value of the ruble. It was still dollars while it stayed in Paypal. Rather clever.

I bought several blades at that time. (As I’m writing this I see that these blades are selling on eBay for $5.00 per hundred blades, plus shipping from Russia.) The ones I purchased were made by Rapira: Platinum Lux and Swedish Supersteel; Voskhod, Super Stainless; Sputnik. I bought the Sputnik only because of the name. How could you not? I had tried the Ladas before and didn’t like them so I didn’t buy any of them.


I’ve used them a bit and find that two are pretty good for paring leather:

The Platinum Lux has worked pretty well. I’ve used them on a few limp leather Bibles and find they do the job pretty well. And the same for the Swedish Supersteel.


I’ve used the other blades, especially for initial passes but have moved to these when I’m close to the desired thickness. The Sputniks haven’t done so well. Even the Vokshods have at times been a bit troublesome. But I have them so I try to use them.

A bit of it depends on the leather. Some of the iffy blades seem to do well on some leathers and are horrible on others.


Now there is an issue to bring up. There have been reports of counterfeit blades being sold on eBay. I think if you look at reviews and search the boards at Badger and Blade you’ll be able to find the reputable dealers. I’m not sure how selling five cent counterfeit blades can be profitable but then I don’t live in an economy like that.

Of course you can avoid the issue all together by buying blades from Israel or India or other countries who make some really nice blades. Check the reviews from the sites listed above.

There are several shaving sites which sell sample packs of blades. West Coast Shaving is one: https://www.westcoastshaving.com.

It may be a bit surprising that there are this many types of blades still available, and that there are many people still using them to shave. Sort of like vinyl records but I think a bit more substantial.

And all much cheaper than the blades that come from Sharf-fix or from our normal bookbinding suppliers. Save the money, explore the choices, and have a bit of fun. What could be better?


Monday, October 10, 2016

Throwing up

A client brought a book by which had some paper damage.  It was a quarter leather with a nideggen tipped on end sheet.


The problem was that several of the pages towards the front of the book had broken a few millimeters out from the spine.  If you look closely you can see the place where the page had broken.  The paper was very brittle. 


But, even with the brittle paper and real issue was the binding.  And here's why.

Spines on books generally need to flex.  The amount that a spine flexes is called "throwing up," as in "how much does the spine throw up?" Maybe this came from drunken bookbinders, I don't really know.

This movement is regulated by how many paper linings are glued onto the spine before the covers are put in place. But it can be more clearly demonstrated by these two bindings.

This is a Coptic binding, which has no paper linings on the spine.


Without any linings the spine can flex completely back onto itself, as seen in this photograph.  This is actually a great thing for the paper, but not so good for the sewing.  All the stress of the opening is on the thread, but there is no stress on the paper at all.


Now take a look at this binding. Clearly with a wooden spine there is no possibility of the spine flexing at all.


As a result when the book is opened it is only the paper that moves in order to open the book.  This is good for the sewing, but is not good for the paper.  To look at the pages the paper needs to be pulled open, especially when the paper doesn't drape very well.  Paper drape has a lot to do with the grain direction of the paper and how thin it is. Bible paper drapes really well because it is so thin.  Heavier papers can still drape well if the grain direction is parallel to the spine of the textblock.


One likes a balance of the two, as in this picture.  But the key to this is that one needs to consider both the qualities of the paper and the type of binding when deciding how many linings to put on a spine when putting a book together.  With brittle paper you want the binding that flexes almost as much as the Coptic binding shown above to reduce stress on the paper.  Without enough "throwing up" the pages will just snap off like the pages in the book I was working on.  With good, flexible paper, where the grain is going in the proper direction, one can make a binding that's a bit tighter which can be good for the sewing and the binding.


It can be seen as a graph showing the relationship between spine throwing up and stress on paper. The challenge is to know where to end up with the finished book to best serve both elements.  When deciding where to end up on this graph the whole consideration needs to be on the paper, its strength, its flexibility, its grain direction, and how well it drapes.


Finally, here is a picture of the spine of the book that I was working on.  See how the spine doesn't flex at all?  Did you get that the paper was extremely brittle?  What they have done with this book is to pretty much insure that the book is going to break one page at a time along the stress point of the paper, which is a few millimeters up from the spine edge of the textblock. 


I would argue that the binder destroyed the book in slow motion by over lining the spine.  They also repaired tears along the first four or five pages, which means they were aware of the condition of the paper. But the material they used to repair the paper was too heavy which just exacerbated the problem. The pages were tearing along the repair, where they should have used a thinner material and extended the repair paper further out from the spine to support the paper beyond its stress point.

I told the client to get rid of the book if they can, it's only going to get worse.  It could be conserved and saved, of course, but the first step would be to get rid of the binding, properly repair the pages and do a better job of putting it together.  As always, it would have been cheaper and better just to do it right the first time.

Sometimes it's better to hire a conservator instead of a binder. Or sometimes a binder needs to make better decisions. 

Monday, October 3, 2016

A clever method of using a Kensol or Kwikprint

A guy took a class from me a year or so ago, not that long after I acquired the Kensol.  He had used a Kensol in his job and showed me a clever way of aligning stamping on covers of book. It works equally well with a Kwikprint.  These pictures were taking using this method on the Kwikprint.

First you finish the cover on which you want to stamp and measure its thickness using a caliper.


Next you select a board (or lamination of boards) to equal the thickness of the cover.


Once you have that figured out, and it needs to be almost exactly the same thickness for this to work, you cut the non-covered piece so it's about the same size as the cover.


Now you put the board in the stamping machine (again, it works equally well for the Kwikprint and the Kensol) and tape a piece of mylar along the edge of the table.


Put the die or title in the machine and stamp it onto the mylar.


You'll end up with this.


One the cover you are stamping place a paper image of the die, or a line of paper or tape if you are doing a title (or really anything will work if it shows where on the cover you want the stamping to end up).


I'm using this example because the image on the die isn't in the proper orientation to the cover, which makes this a better example.  The image in the circle is upright (as shown on the mylar) but I want it to be slanted somewhat to the right.


To compensate for the alignment of the image on the die block I neeed to twist the cover until the mylar was seated directly over the paper image.  When it was I clamped the cover onto the table.


When it's all lined up and the book is clamped in position remove the mylar and stamp the cover.


It's a great technique and may be very well known but I had never seen it.  It's really fun to learn stuff like this from students.

Happy stamping.


Related posts on using the Kensol and Kwikprint can be found here:

Title stamping with a Kensol


Kensol vs. Kwikprint